Zdravo svima!
Srecan Bozic svim pravoslavnim vernicama koji ga danas proslavljaju. Mir Bozji, Hristos se rodi! :)
Hello everyone!
Merry Christmas all the Orthodox Christians who celebrate it today. :) Peace on Earth, Christ's been born! :)
Uradila sam jedan kratak tutorijal o bojenju motiva akvarel bojicama ili vodenim bojama u olovci. To je ono cime bojim i ovde cu vam pokazati nacin na koji ja to radim. Ovaj tutorijal je ono osnovno o bojenju akvarel bojicama. Pa da krenemo.
Pre svega da pomenemo sta vam sve treba od materijala ako odlucite da koristite akvarel bojice.
1. Dobar papir! Obican hamer papir ili bilo koji papir koji nije akvarel ce da se cepa/guli. Ja koristim akvarel papir 300g i bas sam zadovoljna.
2. Vodootporno mastilo/jastuce za pecate, koje se nece razlivati prilikom bojenja.
3. Onda, pecat po izboru naravno, bilo bi dobro da imate akrilni drzac za pecate, u slucaju da ga nemate mozete koristiti plasticni prednji deo, tj. poklopac od kutijice za CD/DVD.
I made one short tutorial about colouriing images with watercolour pencils. It's what I use for colouring and here I'll show you the way I do it. This tutorial is the basics about colouring with watercolour pencils. So let's get started.
First of all to mention all the material you will need for colouring images with watercolour pencils.
1. Good paper! Regular cardstock paper, or anyother paper that is not aquarelle paper, will not be good, it will tear. I use aquarelle paper 300 g and I'm really happy with it.
2. Water resistant ink/ink pad, so it doeasn't run while colouring.
3. Then a stamp, of course, by your own choice. It would be good if you had an acrilic block for stamps, but in case you don't, you can use a plastic CD/DVD case, the top part, as a substitute.
4. Zatim, potrebne su vam akvarel bojice. Sto vise nijansi, to bolje, ali sasvim dobro ce posluziti i manje pakovanje sa oko 12 bojica.
4.Then, you need watercolour pencils, of course. he more shades the better, but a simple pack of 12 would be just fine.
5. Zatim, naravno cetkice, maramica na kojoj cete brisati visak vode sa cetkice i naravno posuda za vodu.
5.Then of course, brushes, a tissue paper where you will wipe the extra, unnecessary water from the brush and a small bucket of water.
Prilikom bojenja, za odredjeni deo motiva mozete koristiti samo jednu boju, ili pak vise nijansi iste boje ili cak i vise razlicitih boja. Neke boje stvarno deluju lepse, ako se koristi bar dve razlicite nijanse, kao na primer zelena.
During colouring, for a certain part of an image, you can use only onr colour, or more shades of one colour, or even more different colours. Some colours really look much better if you use at least two different shades, like green for example.
Akvarel bojice koriste se kao drvene bojice, s tim sto se boja nanosi uglavnom uz ivice/linije motiva, ne boji se dakle cela povrsina, a zatim se prelazi cetkicom zamocenom u vodu i postize se efekat vodenih boja.
Watercolour pencils are used as the simple colour pencils, the difference is that you add colour mostly to the are very close to the lines of an image, you don't colour the whole area and then you go witha brush over it, to get the effect of watercolours.
A sad, da obojimo motiv.
Krecemo sa bojenjem misa. Koristim prvo crnu i braon bojicu, bojim uz same linije, negde se naravno moze dodati i vise boje, obojiti veci deo povrsine, sve zavisno od toga koji intenzitet boje mi treba. Prvo stavim malo crne uz samu ivicu glave, sapi, repa i uveta, zatim dodam malo vise braon boje. Kao na sledecoj slici.
And now to colour the image.
We start colouring the mouse, by using black and brown pencils first, adding colour to to the smaller are by the lines, in some places, of course, you can add more colour, colour a bigger area, depending on the intensity of the colour that you need. First I add some black right next to the lines of the head, paws then I add more brown colour . Like in he next picture.
Onda prelazim cetkicom, tako da najvise boje ostane upravo uz ivice, zbog boljeg efekta osvetljenja.
Then I go with the brush over it, but so that the most colour is left exactly on the areas by the lines, because of the bette lighting effect.
Sledece, koristim crvenu boju, bitno je da se prethodno obojeno sasvim malo prosusi, par minuta. Crvenu stavljam takodje malo na rep, uvo, sape i lice, narocito na obraze i nos.
Next, I use red colour, it's important to let the previously coloured dry a little, for a couple of minutes. Red colour I also put on tail, ear, paws and face, especially on nose and cheeks.
I ponovo bojim cetkicom. Ako na cetkici ostane previse vode, obavezno visak izbrisem o maramicu
Then again I use a brush. If there's too much water left on the brush, you must wipe it on the tissue paper.
Sledece, za kapu, odlucila sam se za roze bojcu, opet bojim uz ivice, dodajem malo vise boje.
Next, for the hat, I decided to use pink, again I colour by the edges /lines, I add more colour.
I bojim cetkicom.
And I use the brush.
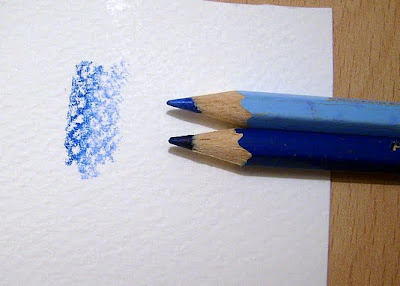
Zatim za tri najmanja kruga na kapi, kao i za masnu na vrhu, koristim ove dve plave bojice. Prvo stavljam tamno plavu, zatim svetlo plavu.
Then for the three smallest circles on the hat and the bow on top, I use these two shades of blue. First I put dark blu and then the light blue.
I prelazim cetkicom.
I go over with the brush.
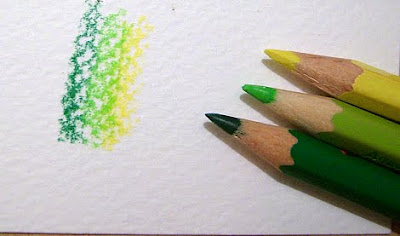
Za tri veca kruga na kapi koristim tamno zelenu, svetlo zelenu i zutu, upravo tim redosledom.
For the three bigger circles on the hat I use dark green, light green and yellow, in that order.
Pa onda opet koristim cetkicu.
And then again I use the brush.
I na kraju , za preostala tri kruga na kapi, odlucila sam se za narandzastu i zutu.
And then, finally for the last three circles on the hat, I decided to use orange and yellow.
I kao i obicno, prelazim cetkicom.
Na kraju, ako nisam zadovoljna postignutim, mogu ponegde da dodam jos malo boje, ili da sa najsvetlijih delova skinem malo boje cetkicom, ili pak te delove predjem belom bojicom, za bolji efekat osvetljenja, za veci kontrast svetlo/tamno. Dodala sam jos i malo zlatnog glitera u olovci u kruzic u centru masne i to je to.
And as usual, I go over with the brush.
And finally, if I'm not sattisfied with the result, I can add some more colour to some spaces, ili take off some more colour with the brush out of the lightest areas, or go over those with white pen, for the better lighting effect, for the bigger dark/ light contrast. I only added some golden glitter pen in the middle circle of the bow and that's it.
Nadam se da vam se svideo moj tutorijal i da ce da vam posluzi. Uskoro cu postaviti jos jedan, o bojenju ljudske figure, cisto da pokazem kako ja bojim lice, kosu...
Bilo kakvi komentari, predlozi pitanja, slobodno recite/pitajte. :)
I hope you liked my tutorial and that it will serve you. Soon I plan to post another one, about colouring human figures images, to show you how I colour faces, hair...
Any comments, suggestions or questions, please don't hesitate to speak/ask. :)


